- Premiere Tutotial
How to Use Warp Stabilizer in Premiere Pro Easily
Mar 29,2019• Proven solutions
Did you ever face a situation where you sit for video editing only to discover that the handheld shots seem to move and jerk constantly? Maybe you did your best in the situation where the vehicle was moving fast and you had no Steadicam or Gimbal but while editing you realize it is too shaky to apply any effects. Thankfully, the Warp Stabilizer Premiere Pro offers the solution to fix such problems easily. If you ever wanted to get the most out of the Warp Stabilizer Premiere Pro effect, learn how to use it easily.
- Part 1: How to Use Warp Stabilizer Premiere Pro
- Part 2: Warp Stabilizer Settings You Should Know
- Part 2: Tips for Using Warp Stabilizer
Part 1: How to Use Warp Stabilizer Premiere Pro
Step 1: Apply the Warp Stabilizer Effect
Open the video clip that is shaky and full of jerks. Next, click on Effects tab at the top and select the Video Effects option. Scroll down the Video Effects option to find Distort and then double click on Warp Stabilizer. You may even click the Warp Stabilizer option and drag it over to your clip to apply the effect.

Step 2: Analyze Video Automatically
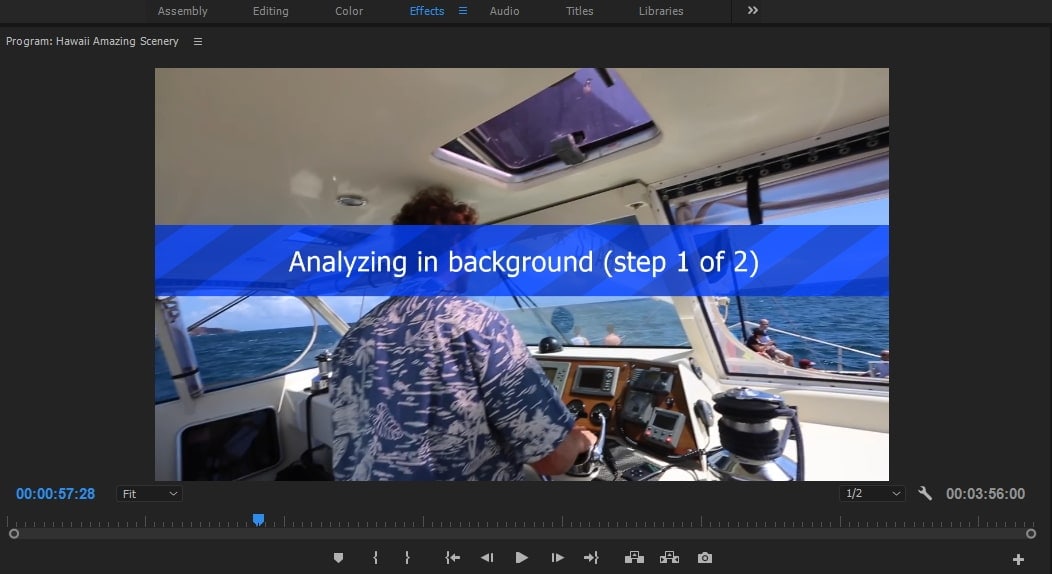
Once you have applied the effect Warp Stabilizer, Premiere Pro starts analyzing the video clip. It takes some time but shouldn’t take long.

You may also like: How to Stabilize Shaky Videos with Premiere Elements
Step 3: Adjust Parameter
Click on the smoothness parameter and adjust it to the best setting for your video clip. High percentage value is not required usually and around 5-10% may be sufficient. Next scroll the Crop Less and Smooth More option to adjust it. Completely remove any unwanted crop or smooth out your video clip.

Part 2: Warp Stabilizer Settings You Should Know
1. Analyze
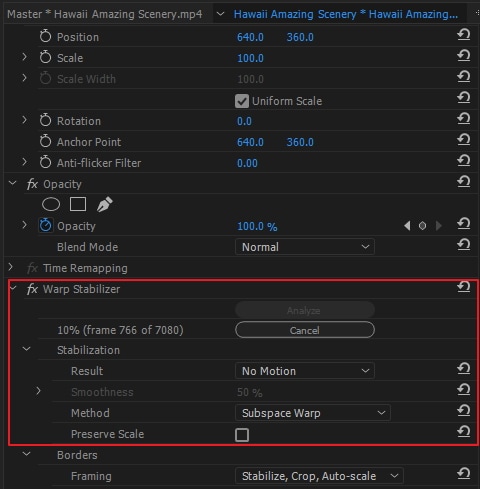
You don’t need to press the Analyze button while applying the Warp Stabilizer. It is automatically pressed when you apply the effect. Until and unless you make any changes to the clip, the Analyze button remains turned off. For instance, if you make any changes to the In or Out points of the layer or if you make some upstream modification to the source of the layer. Click the button to reanalyze the clip. Reanalyze the clip by clicking the Analyze button.
2. Result
The Smooth or No Motion in a video is controlled as a planned result for the video clip.
Smooth Motion is a default setting and the original camera movement is retained by it, yet you can correct the smoothness of the clip. When you select the Smooth Motion, you can control how smooth you want a clip to be.
In No Motion option, all the jerks or movements are tried to remove from the shot. When you select the No Motion feature, the Crop Less Smooth More function in the advanced section is disabled. When you want to leave a part of the main subject within the frame for the entire range being analyzed, the No Motion setting is used.

3. Method
In this segment, the most vital and critical operation is performed by the Warp Stabilizer performs on the video clip to stabilize it.
The more perfect is the position data is, the better Stabilization your footage receives. So, the Position is the most complex need for stabilizing a clip. Another most important data requirement is scale and rotation. If there is not enough space to track, Warp Stabilizer prefers to stick to Position type instead of stabilizing the clip with Scale and Rotation type.

In Perspective type, the stabilization depends on the complete frame which can be effectually corner-pinned. If the track lacks the areas to work on, Warp Stabilizer chooses the Position, Scale, and Rotation type.
Subspace Warp is a default setting that tries to warp several parts in the frame in different ways to stabilize the whole frame. If space is lacking to work on, the Warp Stabilizer choose the previous type (Perspective). If there is tracking accuracy, the method you are working on in any given frame can be changed across the timeline of the clip.
Part 3: Tips for Using Warp Stabilizer
1. Be Careful Of Effects Orders
The Effects, you see at the top in Premiere Pro and in After Effects are the first ones to be applied. Some people asked the effects order issue in forum. The Warp Stabilizer effect must be applied first before any other effects. Are you thinking about how does it matter?? For instance, you are using the Lumetri Color Effect on the clip. If you apply any other changes to the Lumetri setting prior to the Warp Stabilizer, the source analysis of it changes and you need to analyze it again. So, be careful to apply the Warp Stabilizer effect at the beginning.
2. Warp Stabilizer Advanced Options
In the Advanced option of Warp Stabilizer, you may select the detailed analysis checkbox to slow down the project. It will turn the project file bigger. Then, you may control the limits by selecting Crop Less <-> Smooth More option. Either you may leave the edges more or crop more edges to stabilize more. You can also find Synthesis edges framing options. If you don’t want Premiere Pro to warn you about a necessity to reanalyze the footage, hide the warning banner checkbox must the selected.
3. Proxy Workflow
The Premiere Pro displays the complete resolution file, whereas, you can use Warp Stabilizer in the Proxy Workflow. The Toggle Proxies button is ignored as it is an analysis effect.
Conclusion
For a stable and great looking clip, now you have all the necessary tools. With your sequence ready to go with perfect effects, you are just left to share it with the world. Check out this article for more information on how to use Warp Stabilizer in Premiere Pro.
Bring up your video to a professional level with straightforward tools.
Try It Free Try It Free


Liza Brown
chief Editor
0 Comment(s)